Turning a Clip Art Pattern Into an Embroidery Pattern
Hand Embroidery Patterns: Converting Pictures to Stitches
Paw embroidery patterns are a great style to create imagery in floss. But what if you tin can't find the verbal pattern your looking for? Or you have a specific photograph you want to stitch? What steps tin can y'all have to convert a picture to an embroidery pattern?
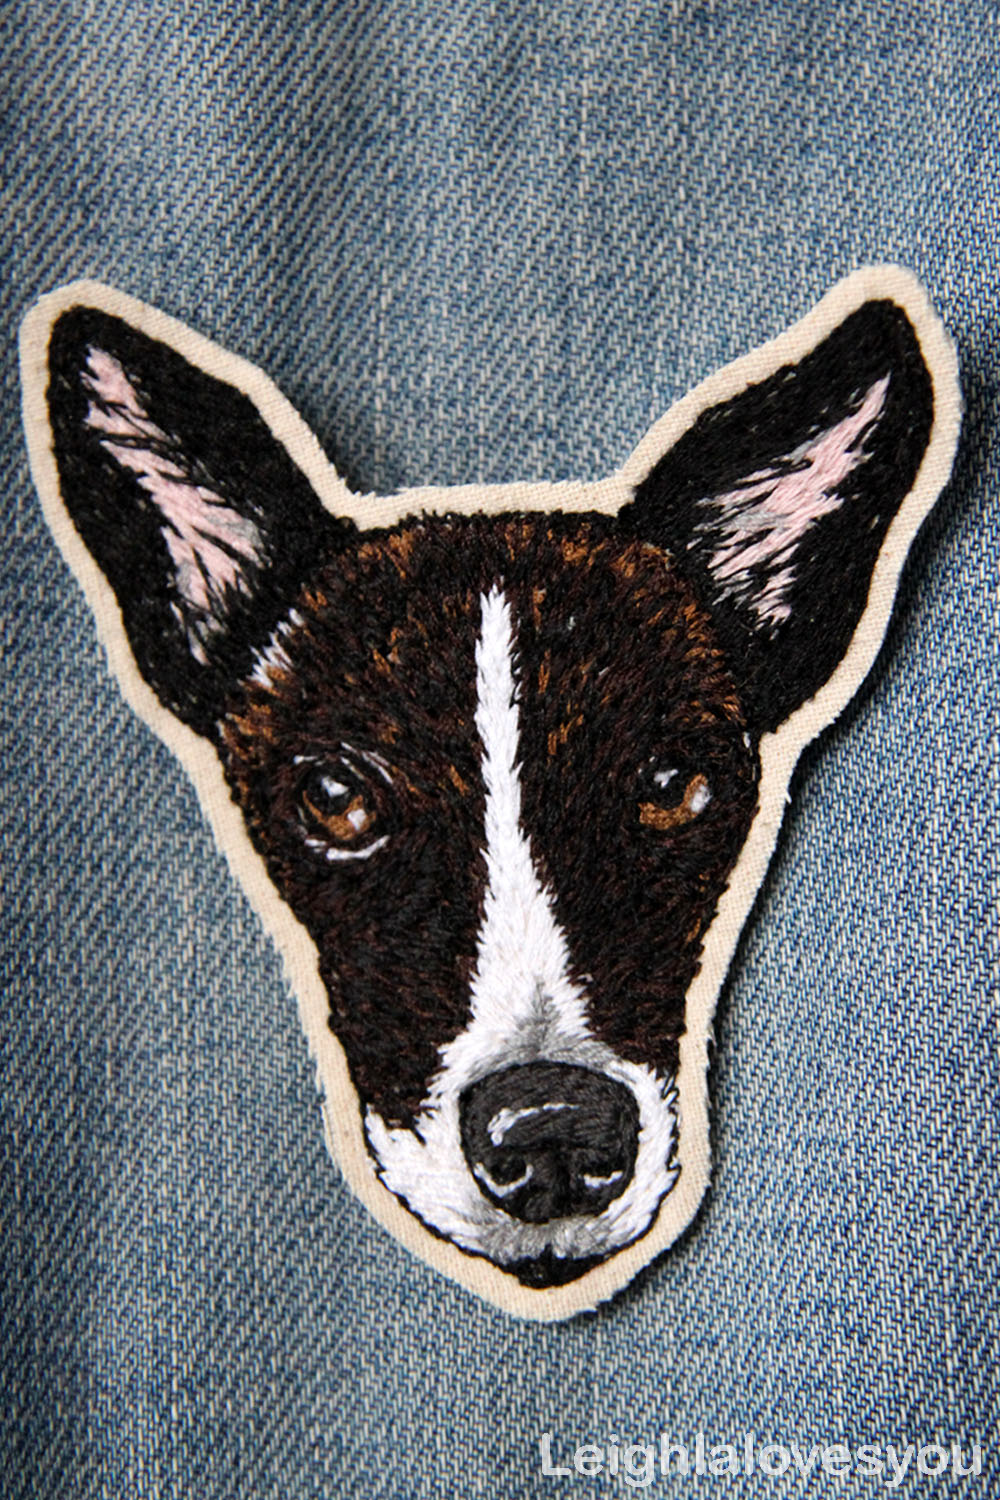 Photos via Leighlalovesyou
Here are tips to translate your images into embroidery patterns!
The pet portrait above will provide usa with an image guide for creating an embroidery blueprint. Although the stitching technique used for this slice were free-mitt machine embroidery, the process and steps taken are the same with any hand stitching.
Stride 1: Creating the outline
You take selected your epitome/photograph, and now y'all need to get in into a pattern- but how? Don't worry if y'all're not a sketch creative person, hither are a few steps to become you on track:
ane. Tracing is not adulterous: Don't be afraid to use tracing paper to get an outlines just correct.'
2. Don't worry virtually detail: Get equally much as you lot experience comfortable with. It doesn't accept to have 1,001 lines for information technology to look exact. By picking up the right elements y'all tin make the prototype look effective but not overdone.
3. Remember the stitch: Don't forget, you take to catechumen these pencil lines to embroidery thread, then consider thickness and closeness of lines and how this will be translated later on.
4. Use technology! At that place are tons of ways you can catechumen your image on your computer, rather than by hand. Websites or software like Adobe Photoshop can put your image through a filter to requite it a simpler outline!
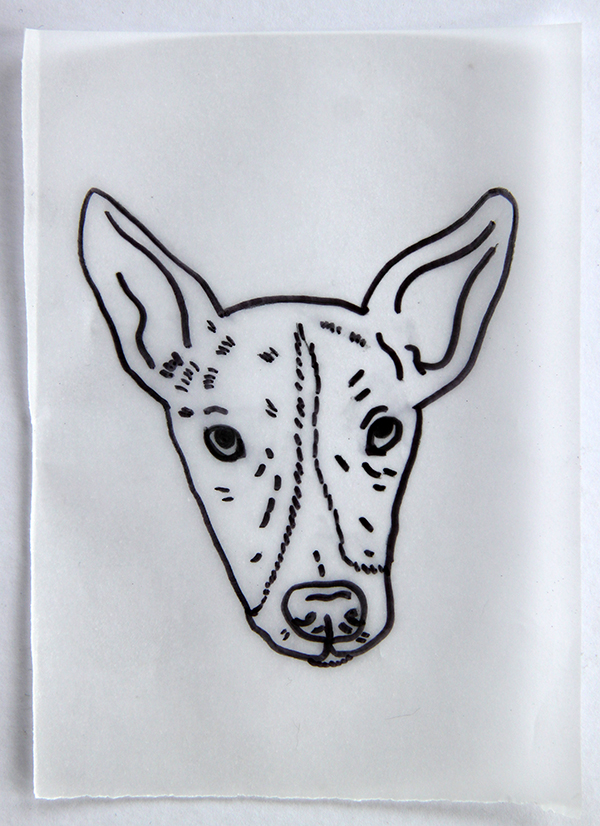 Outline pattern drawn onto paper.
Step two: Transferring the prototype to fabric
Outline at the prepare, but how do you put it onto textile? Many of yous will have experience using embroidery patterns, and will have your ain tried and tested techniques. If you haven't, in that location are many ways your image tin make it's manner from paper to cloth, and then here are a few ideas to get you lot going:
1. Using a light box tin can exist very effective. However, you don't need expensive equipment to get results- just use a window! Taping your outline onto the glass, and so your textile on tiptop ways you can trace the paradigm direct, either in pencil or water soluble fabric pen. Another method would exist to use your computer screen as a light box, tracing direct from digital outline to fabric.
2. Carbon paper is probably the simplest method of transference. Just identify the carbon paper between your paper outline and your fabric, then trace away!
3. Water soluble stabilizer is a smashing style to transfer an image onto darker fabrics. Trace your design onto the stabilizer and place on meridian of your textile. Stitch through both the stabilizer and fabric layers, then soak the stabilizer away before y'all exercise your filling stitches. Wild Olive explains this process perfectly!
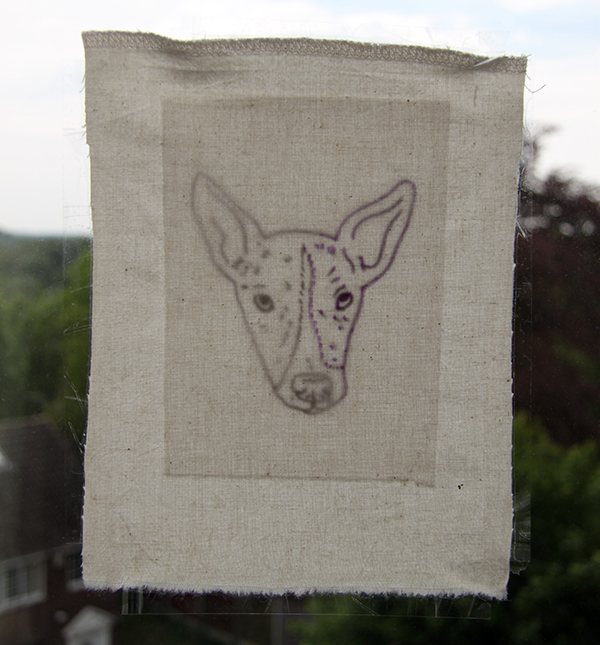 Tracing outline from newspaper to cloth using a window as a light box
Step 3: Stitching
If you're non a seasoned stitcher, the next part could be a trivial scary. Don't worry, we've got it covered:
1. Remember about your outline: Volition it match the interior colors or be a assuming contrasting color (i.e. black outline with colors inside). What type of stitch would work best for this?
two. Consider your color palette. Are y'all going to stick with colors from the original epitome or choose your own? Don't be afraid to mix it up! Selecting a express corporeality of colors can also expect not bad, and y'all tin can coordinate them with surround (east.1000. the photo frame, the rooms interior tones).
3. Using a "colour by numbers" type technique to build up layers of tone can exist really effective. I often work from light to nighttime, only it can depend on the project. Marker the areas that your going to run up with a water soluble pen and stitch i tone at a time.
4. Exist experimental with your stitches. Consider stitch management for areas such as pilus or fur to add realism and texture.
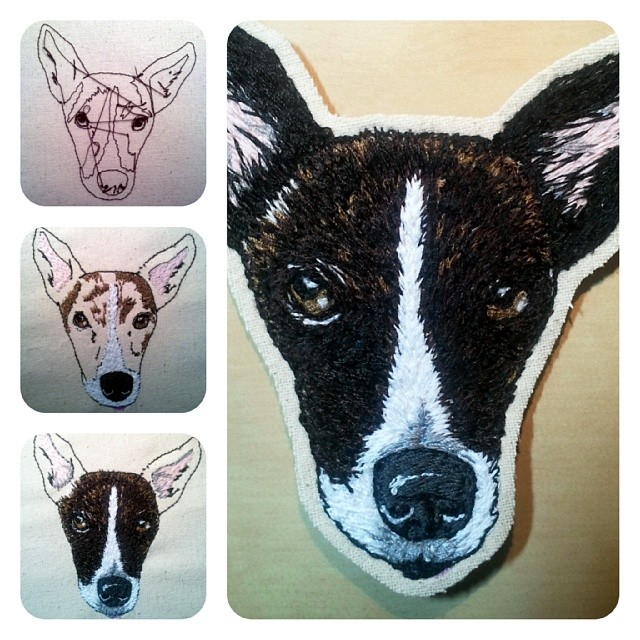 Working from calorie-free to nighttime
Finally, do not put too much pressure level on yourself to brand the embroidery wait exactly like the original image. Retrieve, the materials and techniques of creation accept changed, they're not going to exist exact matches. Plus, office of the fun is giving information technology a new lease of life, and putting your own personal stamp on it!
[box type="shadow"]
If this all sounds heady, but yous're still not totally articulate on where to begin, why not endeavour 1 of our online classes?Design It, Sew It: Hand Embroidery with Jessica Marquez has information technology covered! Or, expand your embroidery skill fix with Kristin Nicholas in Stitch It with Wool: Crewel Embroidery!
[/box]
What photo will you catechumen to embroidery?
Source: https://www.craftsy.com/post/how-to-convert-a-picture-to-an-embroidery-pattern/